The Ultimate Guide: Install COBOL for Free with VSCode in 2025 (Step-by-Step Tutorial)
TL; DR: Install WSL2, Debian, GnuCOBOL, and VSCode to create a modern COBOL development environment in under 10 minutes. Perfect for beginners, students, and professional developers.
Why Learn COBOL in 2025?
Quick facts that might surprise you:
- COBOL handles $3 trillion in daily commerce
- 95% of ATM swipes use COBOL
- 220+ billion lines of COBOL still run in production
- Only 0.4% of developers know COBOL (Stack Overflow 2024)
What You'll Learn in This Guide
✅ How to install a free COBOL development environment
✅ Set up VSCode for COBOL programming
✅ Create, edit, and run your first COBOL program
✅ Use modern development tools with legacy languages
Prerequisites
- Windows 10 version 2004 and higher (Build 19041 and higher) or Windows 11
- 4GB RAM minimum (8GB recommended)
- 64-bit processor with virtualization enabled
Complete Installation Guide
Step 1: Install Windows Subsystem for Linux (WSL2)
Time: 2 minutes
1. Open PowerShell as Administrator
2. Run:
wsl --install --no-distribution
3. Choose 'YES' when prompted
4. Restart your computer
Step 2: Install Debian
Time: 2 minutes
1. Open Microsoft Store
2. Search for "Debian"
3. Click "Get" or "Install"
4. Launch Debian from start menu
5. Create your UNIX username and password
Step 3: Install GnuCOBOL
Time: 2 minutes
Run these commands in Debian bash:
sudo apt update
sudo apt install gnucobol
Step 4: Install Visual Studio Code
Time: 2 minutes
1. Download VSCode from (https://code.visualstudio.com/download)
2. Install with default settings
3. Open VSCode
Step 5: Configure VSCode for COBOL
Time: 2 minutes
1. Install required extensions:
- Open VSCode
- Go to Extensions (Ctrl+Shift+X)
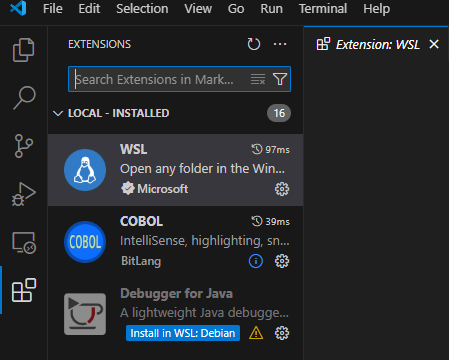
- Search and install:
- "Remote - WSL"
- "COBOL Language Support"
- "Bitlang COBOL" (for syntax highlighting)
2. Connect VSCode to WSL:
- Press Ctrl+Shift+P
- Type "WSL: connect to WSL using Distro"

- Select Debian
Step 6: Create Your First COBOL Project
Time: 3 minutes
1. In VSCode terminal (WSL window): Open VSCode's integrated terminal (Ctrl+`) [ ` is the key above TAB]

run below commands to create cobol-projects folder and launch vscode's new window.
mkdir cobol-projects
cd cobol-projects
code .
2. Create a new file: `hello.cbl`
3. Copy this code or write your own:
IDENTIFICATION DIVISION.
PROGRAM-ID. HELLO.
ENVIRONMENT DIVISION.
DATA DIVISION.
PROCEDURE DIVISION.
DISPLAY "Welcome to Modern COBOL Development!".
STOP RUN.
4. Compile: Below command creates an executable file with the same name as code file.
cobc -x hello.cob

5. Troubleshoot: you might see below error while compiling. To resolve this press ENTER after STOP RUN. This creates a newline.
hello.cbl:19: warning: line not terminated by a newline [-Wothers]


Recompile the code after saving the code.
6. Run:
./hello
VSCode Features for COBOL Development
Your new setup includes:
- Syntax highlighting
- Code snippets
- Integrated terminal
- Git integration
- File explorer
- Multi-file editing
Pro Tips for COBOL in VSCode
1. Enable word wrap for better COBOL code readability
2. Use the integrated terminal for quick compilations
3. Take advantage of VSCode's split screen for copybooks
Free Resources to Level Up
1. Official GnuCOBOL Documentation
2. Open Mainframe Project Materials
3. IBM COBOL Programming Course (GitHub)
Join Our COBOL Community
Get help and share your journey:
- Follow me on Medium for weekly COBOL tutorials
- Join our Discord server for real-time support
- Subscribe to my YouTube channel for video guides
- Follow me on Instagram for daily COBOL tips
Author - Sensai
---
*Keywords: COBOL programming, GnuCOBOL tutorial, VSCode COBOL, COBOL development environment, modern COBOL, mainframe development, COBOL for beginners, free COBOL compiler, COBOL VSCode setup*
*Tags: #COBOL #Programming #SoftwareDevelopment #VSCode #LegacyCode #ModernDevelopment*
*Related searches: how to learn COBOL, COBOL jobs, modern COBOL development, VSCode COBOL development, free COBOL compiler*
Comments
Post a Comment